
With version 5.0 WordPress got its new Gutenberg editor, which brought a host of notable changes to the post and page handling with it. The most important new feature being blocks, the core idea driving Gutenberg. Blocks change content production both from a technical point of view as for the user side of things. The technical idea behind blocks is to move away from a single document approach, to using repeatable elements that bring clear structure to pages and posts instead of ambiguous HTML.
To the user blocks offer a straightforward and fast way of building pages or writing articles. All content can be added to the page as their own blocks, according to the type of the content.
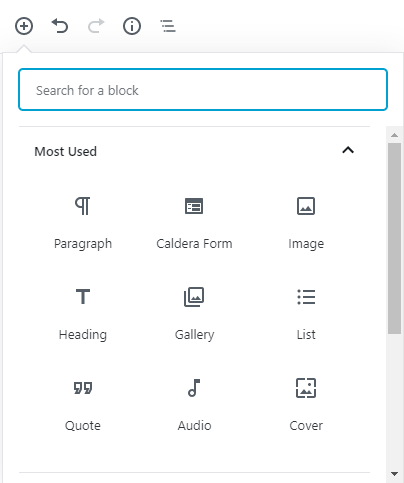
The user no longer needs to browse through tedious menus or recall cryptic shortcodes in order to add specific elements to their pages. Another significant idea behind blocks is direct manipulation, which means that all blocks contain all settings for that specific element.
Very straightforward and easy isn’t it? And very familiar for many people in practice already. But what to do when you wish to add an element to your page that has no block available in the Gutenberg editor?
How to Make Your Own Blocks in WordPress
Blocks, easy to use as they are, would be extremely limiting if you could only use the default blocks bundled with Gutenberg. Luckily this isn’t the case. New blocks can be added as needed, either as pre-made blocks, with the help of plugins that assist in their creation, or by coding new blocks from
Premade blocks often come as plugins, with bundles of different types of blocks in them and are an excellent choice if your desired functionality is relatively simple or commonplace. These are also a good pick if you lack the resources or expertise needed for building new blocks from the
Slightly more challenging, but a notably
The final option is to simply code your own blocks up from scratch, a route that requires the most skill but also has nearly no limits on what you can do with the blocks you put together. WordPress Developer documentation has good instructions on getting started for the more curious block-builders out there.
Happy Medium
We chose ACF as the tool for adding our own custom blocks to make content production smoother on our own pages. This decision was based on our prior familiarity with the tool, as we had previously used custom fields offered by it, and because the plugin offers a straightforward way for adding new blocks.
The need for custom blocks arose during the creation of our new WooCommerce landing page. The page was initially built manually with content hardcoded in the HTML, which didn’t feel like a very natural way for adding content to WordPress, a platform based around the
This page ended up serving as a good starting point for adding our own set of blocks, as we could derive from its structure what kind of content elements our blocks should implement. At the same
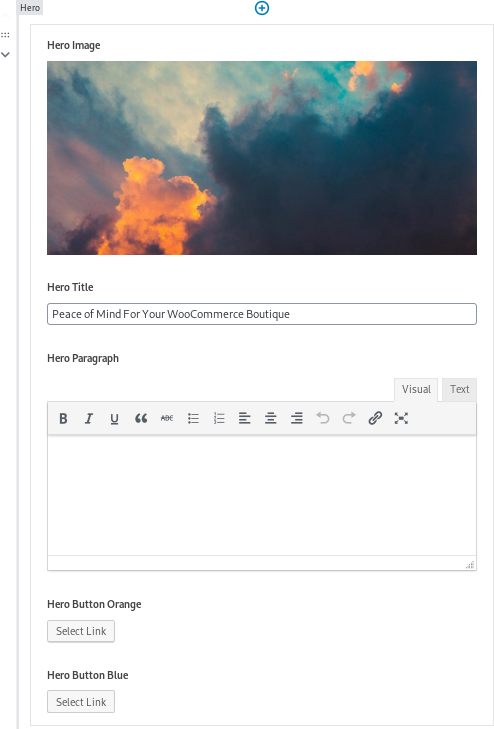
With these thoughts in hand we managed to split our WooCommerce page into four distinct blocks:
- Hero – the first section of the page
- Features – a block for adding repeatable elements with or without images and text
- Services – slightly similar as the previous block, but with different styling and content options
- Plans – a block for different plan options
These blocks will surely see more fine-tuning and continued development but for now, they serve as tools for building new landing pages more swiftly than
Tips from Experience
There is excellent documentation for getting started with ACF Blocks on the official Advanced Custom Fields website, but I wanted to add a
#1. Depending on the theme you’re using, your blocks may require a new Template file, especially if your blocks handle page structure.
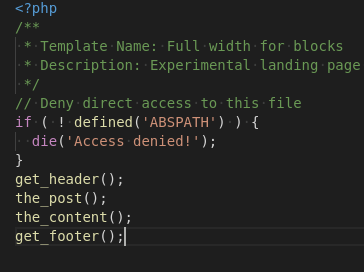
#2. Remember to check your paths if you’re using a child theme! The paths used in the examples in most instructions are based on working with main theme, and thus they often won’t work as is if your project is being built on a child theme.

get_template_directory_uri()get_stylesheet_directory_uri()In the next article on blocks we’ll take a look at expanding block functionality by adding JavaScript to them!
Whether you choose a plugin with pre-made blocks or building your own blocks from the scratch, you now get to better utilize the possibilities offered by Gutenberg!